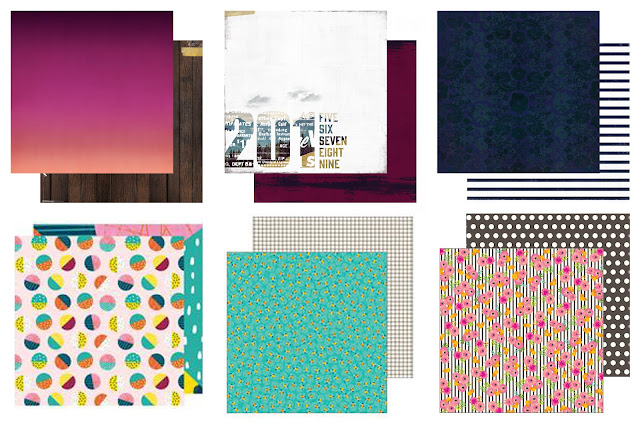
Here is Leslie's inspiration kit:
 |
| April Scrapbooking Main Kit from Mind the Scrap |
 |
| A closer look at the papers, including "B" sides |
The great mix of graphic grunge/bright & whimsical gives an opportunity for some messy fun.
The embellishment pack looks like a chance for some doodling & coloring.
Here's a peek at the Team's take on some elements of the kit,
plus some resources for you to utilize:
Cindy made a few embellishments from the inspiration kit and a DIY paper. You can check out her process on her blog here.
Hi there, Lisa here!
In the inspiration kit you can find word stickers that you can foil yourself which reminded me that I should let you know - just in case this is new for you - that you don't necessarily need to have ready-made, designer products or a branded foiling heat product.
I had some fun with foiling things á la Heidi Swapp Minc products in the past and wanted to pass on how easy it is even if you don't have the official Minc machine!
You will need access to a:
laser jet printer
a laminating machine
a set of foil sheets
I use these foil sheets from the Scrapabilly online shop but you find similar ones in all scrapbooking and hobby shops.
What you need to do is:
1. Print out your design on a laser jet printer - this is important because the toner powder will activate the foil sheets. It doesn't work with an ink jet printer.
2. Cover the area that you wish to foil with the foil sheets - so the black laser-jet printed parts!
3. Just to give it a little protection, sandwich the item you are foiling between two sheets of regular printer paper.
4. Make sure your laminating machine is really hot - I left mine to heat up for over 10 minutes.
5. Pass your foiling project through the laminating machine slowly.
6. Carefully remove the foil sheets and it should have transferred to the areas printed.
Jennifer McGuire has a great video here - https://www.youtube.com/watch?v=g2ABXldEEv0 - where she shares 5 different ways of transferring foil to your projects including the printing/laminating method I'm describing here!
I found some cute pocket page cards here (http://indulgy.com/post/q4vORlX3C3/free-printable-journaling-cards) with bold black wording that would work really well with this printing method.
For those of you who don't have a laser jet printer, you can always use a printing service or ask your boss! I even saw someone online who had sent pages to a printing service with solid black blocks on the paper and then she die cut out of that and sent that through the laminating machine - so clever!
I first did this technique back in 2016 when I had a birthday party at home for Queen Eizabeth's 90th birthday and wanted to send out some rather posh invites! The effect works so well and there are so many wonderful coloured foils to chose from. I know that you can apply foil to all sorts of different projects so you might want to be careful that you don't get addicted!
Julene was inspired by the cat on the above page.
So she went to Pinterest and found these ideas.
There was also a cat outline which was traced from the monitor using thin white paper then cut out.
She has used it on this layout and added stitching detail around the edge, plus a face.
She also found some quotes to go on cards featuring a light globe.
I love you watts and watts
You turn me on
Your future is bright
I think you're brilliant
You brighten my day
and this one...
Laura got messy and created her own version of the navy blue glitter thickers "I hand lettered some phrases in navy blue pen, cut them out with my trustee pink scissors, added some glue and glitter and voila! I then wondered if hairspray would work as a sort of sealant to stop the glitter transferring. I gave them a spray and it worked pretty well! It was a wee bit fiddly but fun and i love the end result!"
We love to see your work, so please share your kits and projects with us. You can do this by using our Link-Up Page here on the blog, posting in the Counterfeit Kit Challenge Facebook Community or on Instagram (we are @counterfeitkitchallenge and use the tag #counterfeitkitchallenge).


Clever idea Laura.Might have to borrow that one.
ReplyDelete